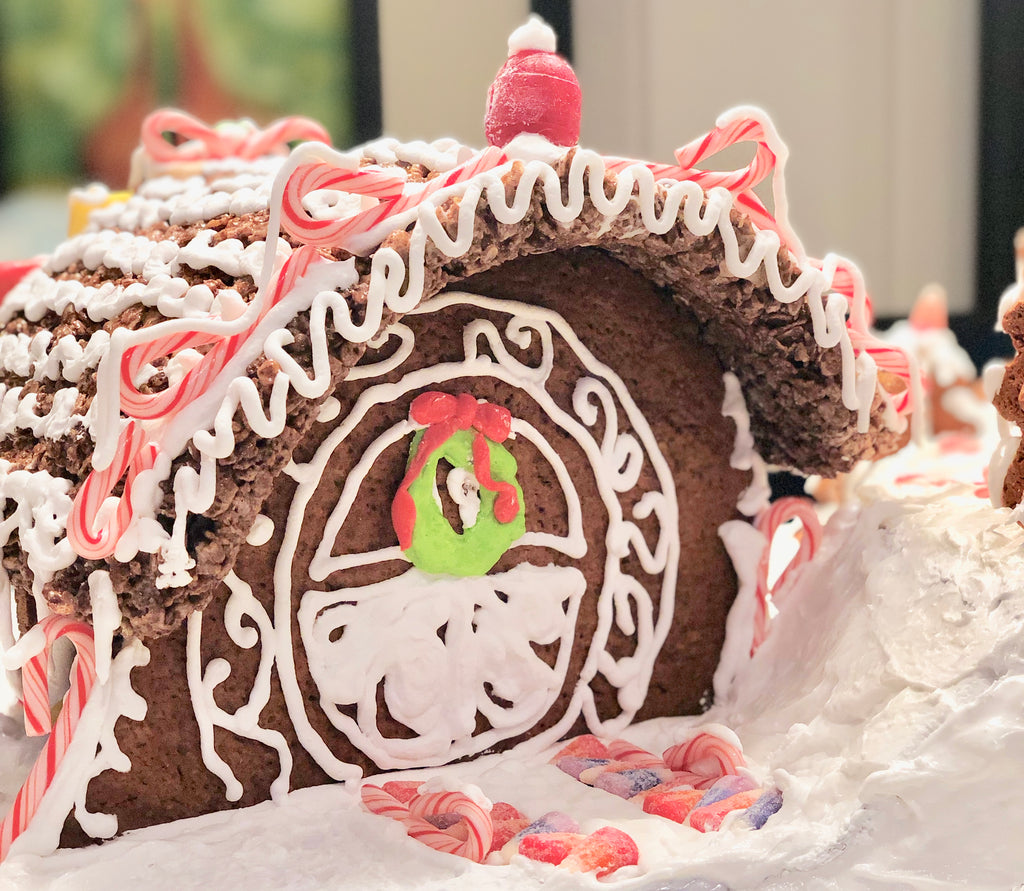
A Different Take on Gingerbread Houses

When our kids were toddlers, the hubs decided we should start a tradition of making a gingerbread house each year. The first year, he took the lead on it, spending a pile on candy and creating a very traditional and beautiful house. But life took over each subsequent year, leaving me to do the deed, admittedly with a little bitterness since it was a ton of work and not my idea. When we first moved into our current home, in 2007, we even made the cookie creation in the likeness of our house. As the weeks of December went by, the Georgia humidity took its toll and the porch started caving in. It was then that I decided OCD gingerbread houses were not for me. Soon after, a new tradition was born.
Being inspired by live-action version of The Grinch and the incredible setting of Whoville, I decided that the best thing to do would be to “embrace the imperfect”, intentionally making everything wonky and crooked. The process takes a fraction of the time. Hardly any measuring is required and there is no need for trimming to be sure everything fits perfectly. Once finished, our houses become a centerpiece. Read on to find out how to make these fun confections.
THE PROCESS
-
Mix up your gingerbread dough. Since we don’t actually eat these, flavor is not important. Our recipe is not tasty but it works for construction and the smell is still wonderful.
-
Line cookie sheets with wax paper. Lay some dough on the paper and another piece of wax paper on top. Roll it smooth to about 1/2 “. Chill.
-
On a piece of paper, draw the outline of your house. Remember that “wonky” is the name of the game.
-
Transfer the pattern to wax paper and cut it out.
-
Roll the chilled dough about 1/4” thick. If your pieces are big, go a little thicker.
-
Trace your pattern and cut out the dough using a knife or pizza cutter. Take away the excess.
-
Repeat for the backside but reverse the pattern.
-
To make the sides, decide how deep you want the houses. Cut a rectangle that deep and make it as high as the sides of the house. It’s okay if your pattern is wavy. Just decide where you want the walls to be.
-
Bake according to your recipe until they are on the verge of burning. You want them hard.
-
To make the roof, while pieces are baking and cooling, mix up some Rice Krispie treats but use generic Cocoa Krispies. For each roof, make one recipe in a 9 x 13 pan lined with buttered wax paper. Our houses are usually no more than 6” deep so that size works well. Let them harden for at least a day before using them. Otherwise they could tear apart.
-
To assemble, mix up plenty off royal icing. It acts like glue and hardens. Again, it’s not tasty but it does the job. Normal frosting will not work. Be sure to put a bead of frosting on the surface on which you will be displaying your house so the bottom of the it will stay in place.
-
When the walls are solidly in place and the frosting has dried, lay the Cocoa Krispies on top and gently push down to form the roof.
Then using leftover colorful candy from Halloween, and frosting bags and tips, go crazy. We have six people in the family so we usually work in pairs with each person getting two sides of the house. Admittedly, I embellish a little after everyone is done and also cover all of the “ground” with frosting. The actual decorating takes about 90 minutes for all three houses.
So for those who love the idea of gingerbread houses but are intimidated by them, try this method. Embracing the imperfect has never been so sweet!


Leave a comment